Ah, window treatments…
They always have a challenge for me since I’m not particularly eager to sew.
 Case in point: My daughter was a bridesmaid at a wedding where the bride-to-be gave each girl fabric and asked them to make their dress from a pattern of their choice. Since my daughter doesn’t sew, I thought, “Are you sure you want to be in this wedding?” But momma guilt kicked in, and I made the dress.
It ended up fitting like a glove, but if I had to charge for the hours I put into making the dress, it would have cost more than an average wedding dress. The truth is, when it comes to sewing, I’m just plain slow.
Solution?
Create no-sew drapes for my Casita.
Better yet, valances!

But there was another challenge I had to overcome…
Because a Casita has a fiberglass shell, one challenge was I could not screw a curtain rod into the camper walls.
The mini-blinds in a Casita are fastened to the window frames, so the first thing I had to figure out was how to make lightweight window treatments that didn’t need rods.
I created valances using balsa wood, fabric, and lace, which I attached to the mini blind’s rod using Velcro strips.
Creating the Valances for the Windows Surrounding the Bed:
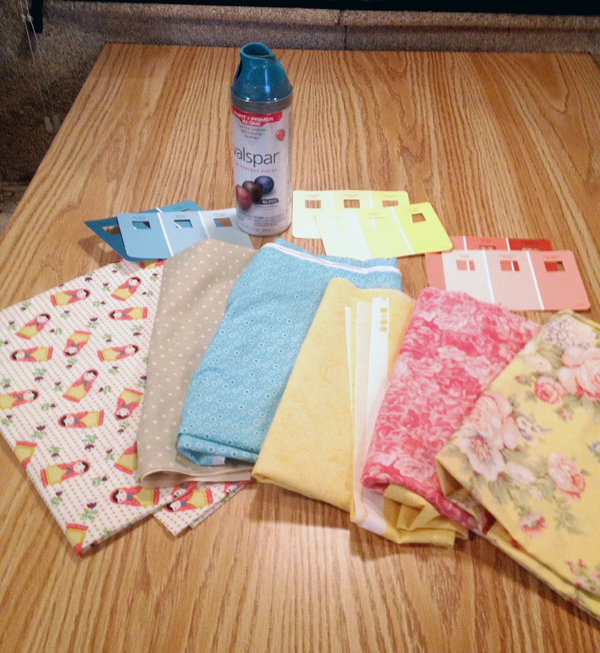
For the three windows surrounding the bed, I made valances from balsa wood wrapped in teal fabric
Next, I would drape the wood covered in fabric with vintage lace from an old wedding dress.
I was happy with this plan because it would allow me to attach the lightweight valances to the blinds using only Velcro. The following images show the process I took from beginning to end:
~ ~ ~ ~ ~ ~ ~ ~ ~ ~ ~ ~ ~ ~ ~ ~
I purchased four 3″ x 36″ x 1/4″ thick pieces of balsa wood.

~ ~ ~ ~ ~ ~ ~ ~ ~ ~ ~ ~ ~ ~ ~ ~
I then cut out strips of fabric, about a 1/4″ wider all around than the wood. I then coated the balsa wood with fabric Mod Podge![]() (affiliate link) and applied the fabric:
(affiliate link) and applied the fabric:
advertisement

~ ~ ~ ~ ~ ~ ~ ~ ~ ~ ~ ~ ~ ~ ~ ~
Once I applied the fabric to the front, I flipped the wood over and used more Mod Podge, then wrapped and trimmed the material to the back:


~ ~ ~ ~ ~ ~ ~ ~ ~ ~ ~ ~ ~ ~ ~ ~
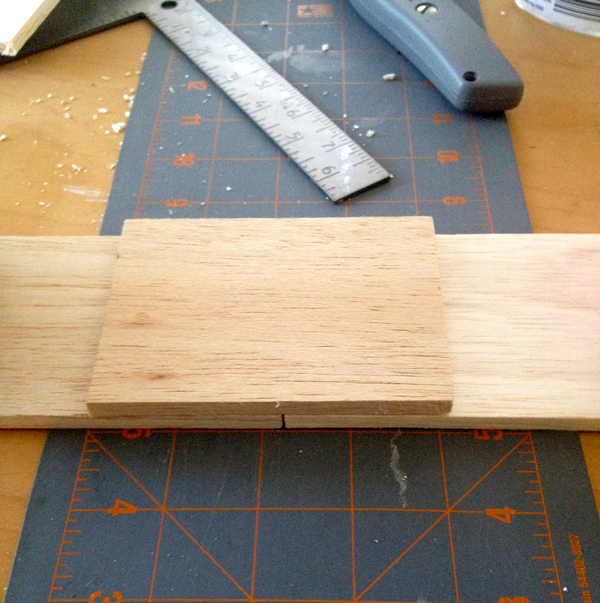
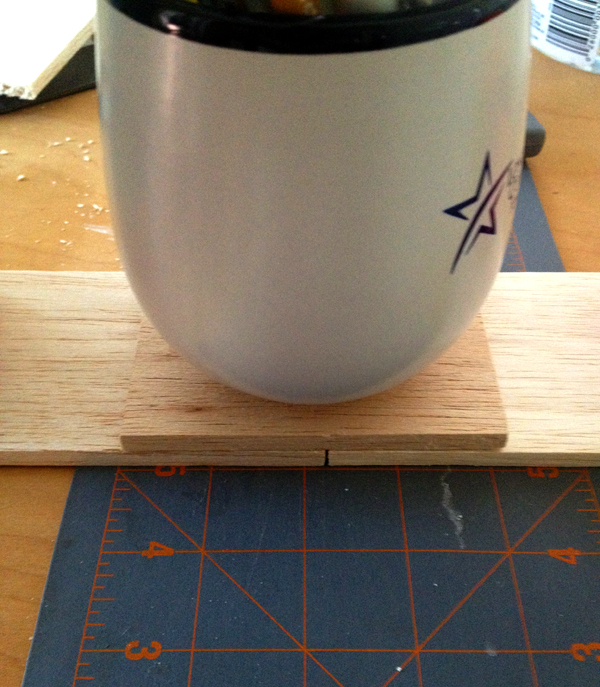
Since the back window of the Casita is almost 5′ wide, and I could not find a piece of balsa wood that long, I had to join two shorter pieces together before I could wrap it with fabric. The following images show how I accomplished this:
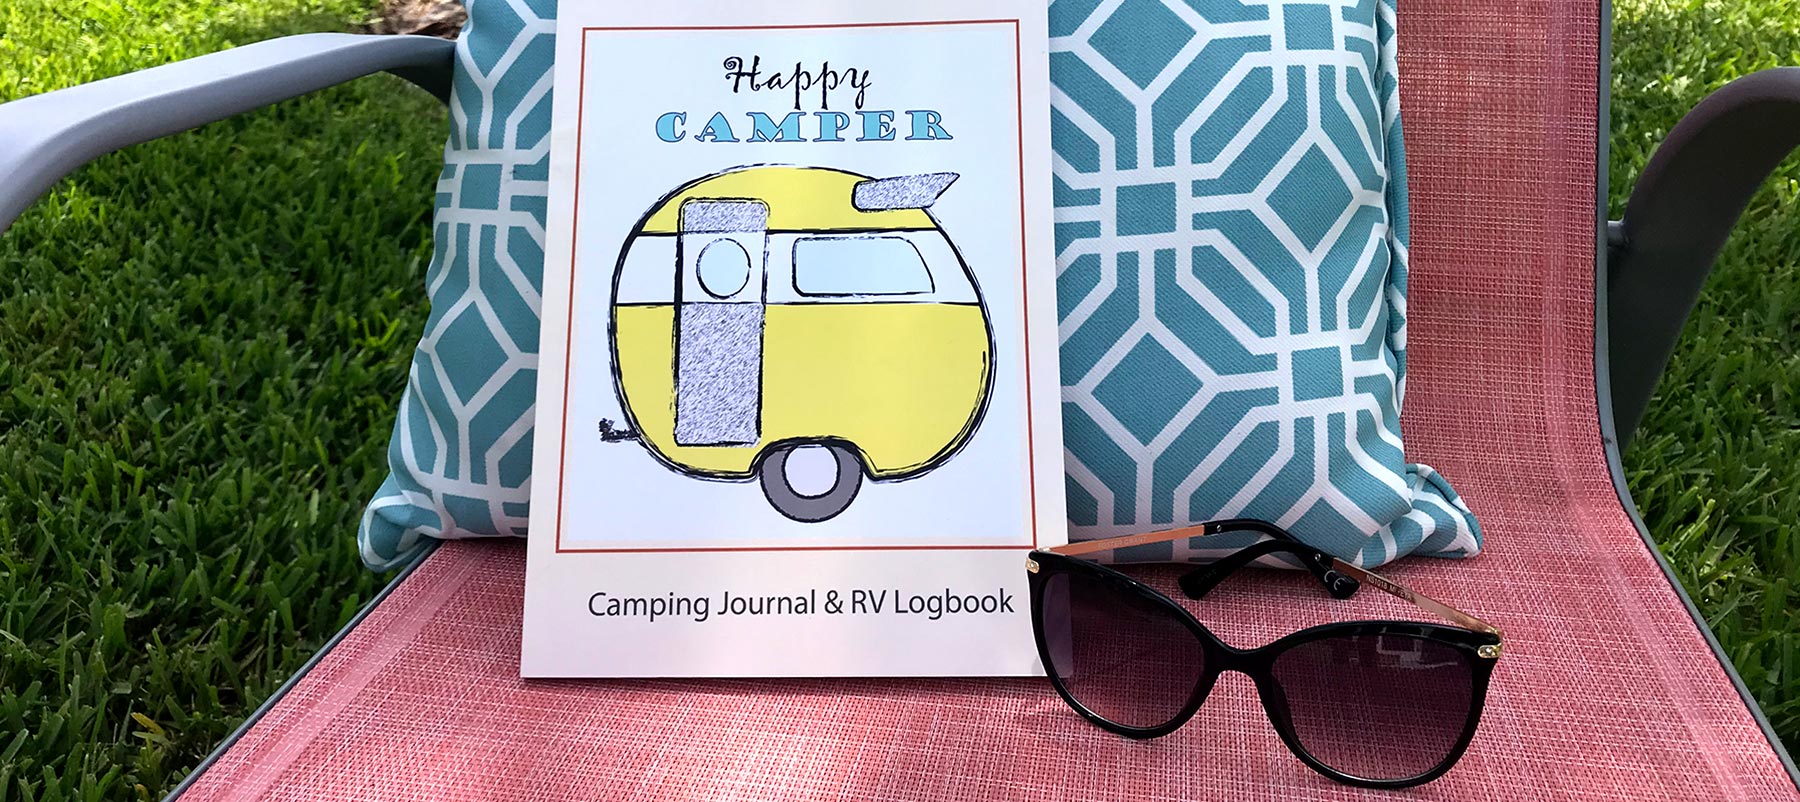
Want to keep track of all your camping memories and details?
Then order a copy of Mrs. Padilly’s “Happy Camper” Camping Journal
& RV Logbook!
Click HERE to get your copy today. #ad

~ ~ ~ ~ ~ ~ ~ ~ ~ ~ ~ ~ ~ ~ ~ ~
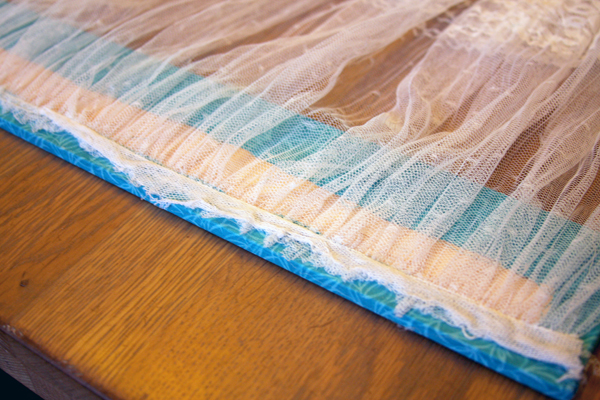
Time to add the lace:
Now that the balsa wood was covered in fabric, it was time to attach the lace.
The lace I used came from the bottom of a 1970s wedding dress. It is beautiful, lightweight, and flowing. Since the lace is pleated and attached to the bottom of the dress with its seam, I cut above the original stitch lines.
I then attached the lace to the back of the fabric-covered balsa wood with hot glue, as seen in the image below:
~ ~ ~ ~ ~ ~ ~ ~ ~ ~ ~ ~ ~ ~ ~ ~
After attaching the lace and wrapping it around the front of the balsa wood valance (as shown in the 2nd picture below), I needed to create “spacers” that would allow the valance to stand off against the mini blind’s valance. This step was necessary to have room for the rod to open and close the blinds.
The following pictures show how I cut the spacers from balsa wood and then attached them to the valance using hot glue.
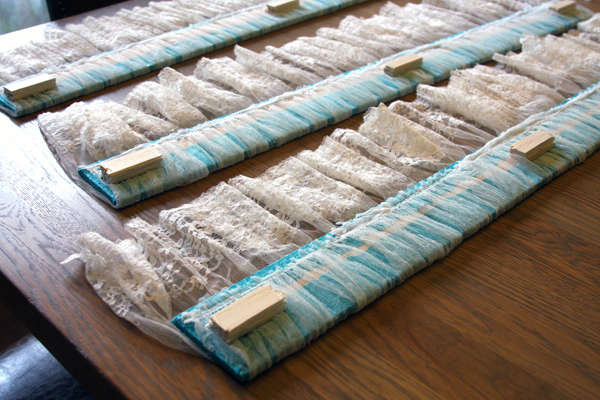
After attaching spacers to the valance, I attached Velcro strips to each piece of wood. Once complete, I used Velcro to stick the lace valance directly to the Casita’s mini-blinds valance.
~ ~ ~ ~ ~ ~ ~ ~ ~ ~ ~ ~ ~ ~ ~ ~
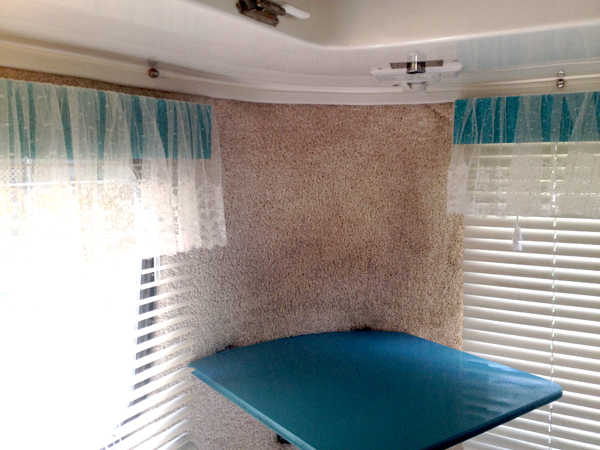
Valances Installed on Mini-Blinds
The following images show the completed lace valances and the attachments to the mini-blinds.
I am pleased with the results! The look is soft and does not block the view from the windows.
However, after our first journey with the Casita, it was clear I had to make one change…
As we traveled, the bouncing Casita was too much for the velcro strips, and the valances fell off. To fix this problem, I put hot glue between the velcro strips. It worked.
~ ~ ~ ~ ~ ~ ~ ~ ~ ~ ~ ~ ~ ~ ~ ~
Valance for Dinette Window:
With the lace valances complete, it was now time to create a window treatment for the window over the dinette area.
I made a simple, lightweight rag valance to make the most of all the fabric I purchased. However, to make a rag valance, I would need to use a rod, which meant I had to figure out how to attach it to the Casita’s existing mini-blinds.
~ ~ ~ ~ ~ ~ ~ ~ ~ ~ ~ ~ ~ ~ ~ ~
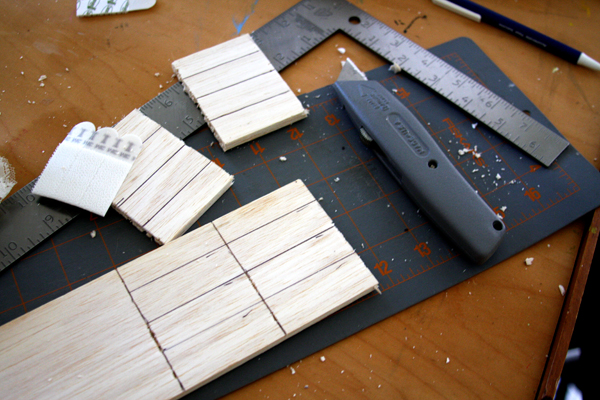
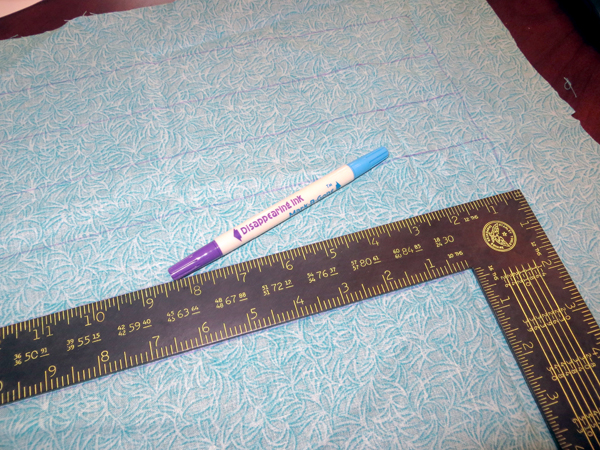
To start the construction of the rag valance, the first step was to cut strips of fabric.
I took a framing square and used the width of the ruler as the width of each strip of cloth (about 1 1/2″). Then, I drew on the backside of the fabric with a disappearing ink pen. I determined that 13″ long strips of cloth would give me the length that I wanted: short.
~ ~ ~ ~ ~ ~ ~ ~ ~ ~ ~ ~ ~ ~ ~ ~
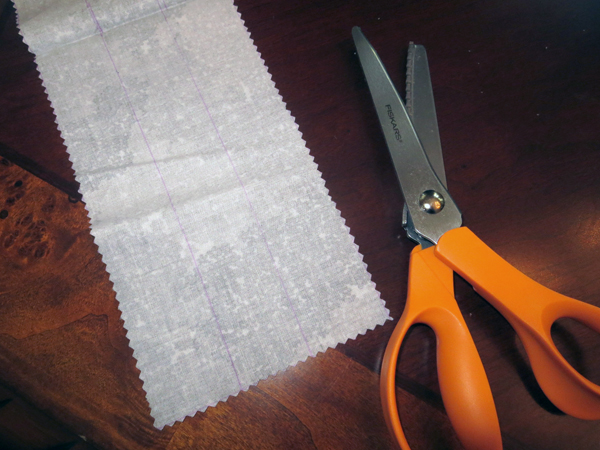
I then cut each strip of fabric with my pinking shears and placed them on the table in the pattern I wanted them to appear on the rod. Afterward, I tied each one using a simple knot. In total, I used 53 strips of fabric.

~ ~ ~ ~ ~ ~ ~ ~ ~ ~ ~ ~ ~ ~ ~ ~
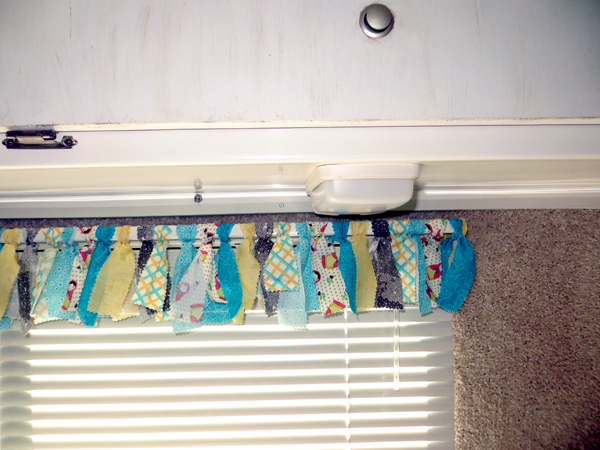
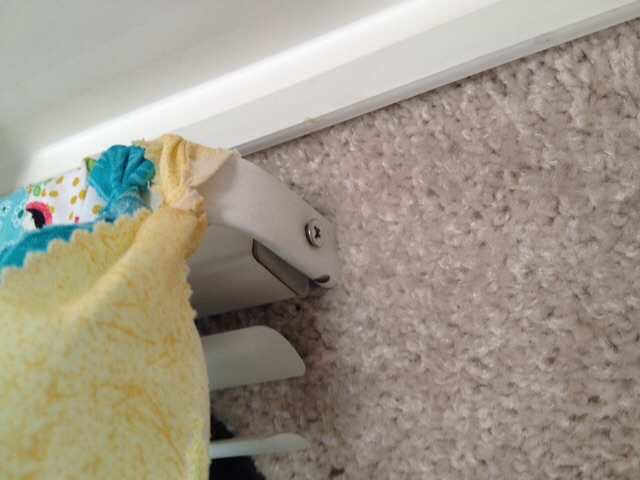
How to Install the Rod
My next challenge was to figure out how to install the rag valance rod on the Casita’s existing mini-blind rod.
To do this, I installed the rod directly on the existing mini-blind valance by first placing a piece of balsa wood in both ends of the rag valance rod (for support) and then screwing both ends of the rod directly into the side of the rod that supports the mini blinds.
I eventually added a little hot glue beneath each end to give it more support from bouncing while in transit (the rod tends to bounce down in transit, but never falls off, so adding hot glue below gives it more support).

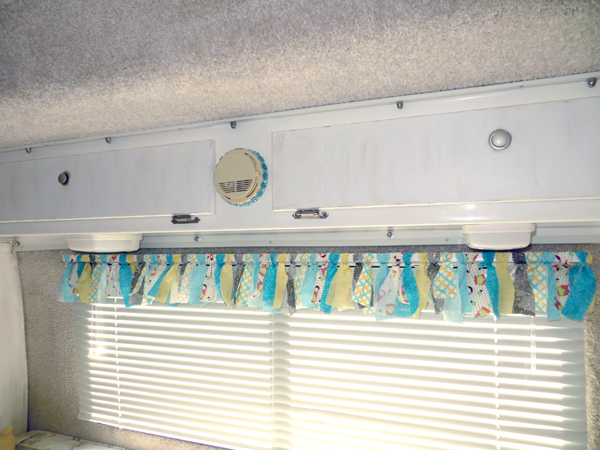
I’m pleased with the results of the rag valance!
Completing the window treatments brings me to the end of my makeover of my Casita. My next post will unveil the interior, which is all set up for glamping. 🙂

Happy Trails!
Mrs. Padilly
Last Updated June 28, 2025
Mrs. Padilly’s 17′ Spirit Deluxe Casita Travel Trailer’s Glamping Makeover Series:
Introduction:
Casita Glamping Makeover:
- Chalk Painting Cabinet Doors
- Adding Teal Paint to Accent Surfaces
- Installing a Tile Backsplash
- Installing Wood Vinyl Flooring
- Stenciling the Screen Door
- Window Treatments
- Dressed for Glamping
Check out my Shasta Makeover Series. Just click below to go to the first article in the series.
Discover more from Mrs. Padillys Travels
Subscribe to get the latest posts sent to your email.
I love your rag valance. It is darling. I am going to do that for my 1969 new old camper I am remodeling. Thanks so much.
I’m happy you like it. Have fun with your remodel project! 😊
I think you did a great job with it all! love the colors. I want to try with an accent of orange. I’m so tired of maroon ugh, 20 yrs of that is quite enough.
Orange is my absolute favorite color! It is in every room of my house. Thank you for your kind comments.
Hello :). How do I purchase the screen door decals? I just purchased a camper and I am so excited about decorating it. :). Thank you.
Hi Leah! Congrats on your camper! I purchased my stencil at my local craft store, but this one is very similar to style and size. Tulip Design Stencil Template, Small, Chandelier

OMG, Donna, what a beautiful and professional presentation of your little casita’s makeover. It was succinct, easy to read, and easy to follow. Loved it!
Hello, Carol! I’m so happy that you visited my blog, and thank you for your very kind words!! Have a great day, and say hello to the family for me!
Wow, what a great makeover, Mrs. Padilly! 🙂 I feel like doing something now, you make it seem quite easy. Well, only sort of …
Piece of cake, Dina! 😉
Thank you so much for this lovely post–what a beautiful and functional project! Your step-by-step instructions and photos are very much appreciated. I’m researching Casitas and hope to someday (SOON!) have a little Spirit Deluxe Casita of my own. Love your blog so far (just stumbled upon it today) and I can’t wait to hear and see more of your great glamping/camping adventures! Rhonda, in Tennessee
Hi Rhonda! So glad you enjoyed the post, and I’m sure your will love your Casita one you bring her home! I see you left other comments on my posts, so I am eager to get to them and reply. 🙂
Whoa! You really do have an idea to cure everything – don’t you!!!
LOL, maybe I should have been a doctor versus a glamper. 😉
LOL 😀
I made cafe curtains for my Casita and was able to hang the rods on 3M Command hooks. Biggest problem is that my husband keeps pulling the curtains down near the bed – by mistake (I think), on the rod over his head at the head of the bed.
I’ve added folding that panel up over the rod to my night time routine.
Too funny, but this sounds like another great way to attach a curtain in a Casita (with a husband warning 😉 ).
Did you stick the 3M Command hooks on the side of the mini-blind rods?
Someone recently told me that they use drapery hooks stuck into the carpet walls of the Casita, and then they hang their rod off that. I think I might have the try that for hanging “things” on the carpeted walls.