It’s been said that “It’s the little things that matter most,” and decorating the screen door on my Shasta was certainly one of those little things.
I first used those words in my original article: Stenciling the Screen Door on a Casita Travel Trailer. One of the most popular projects on Mrs. Padilly’s Travels.
Without a doubt, that small addition to my Casita had one of the biggest impacts on its overall glamping charm (see image below).
advertisement
Personalizing a camper’s door is such an easy project and adds so much character that I decided to do it again on my Shasta.
I hope you find that Version 2 inspires you with more ideas for your camper.
Happy Trails!
Mrs. Padilly
My New Trailer:
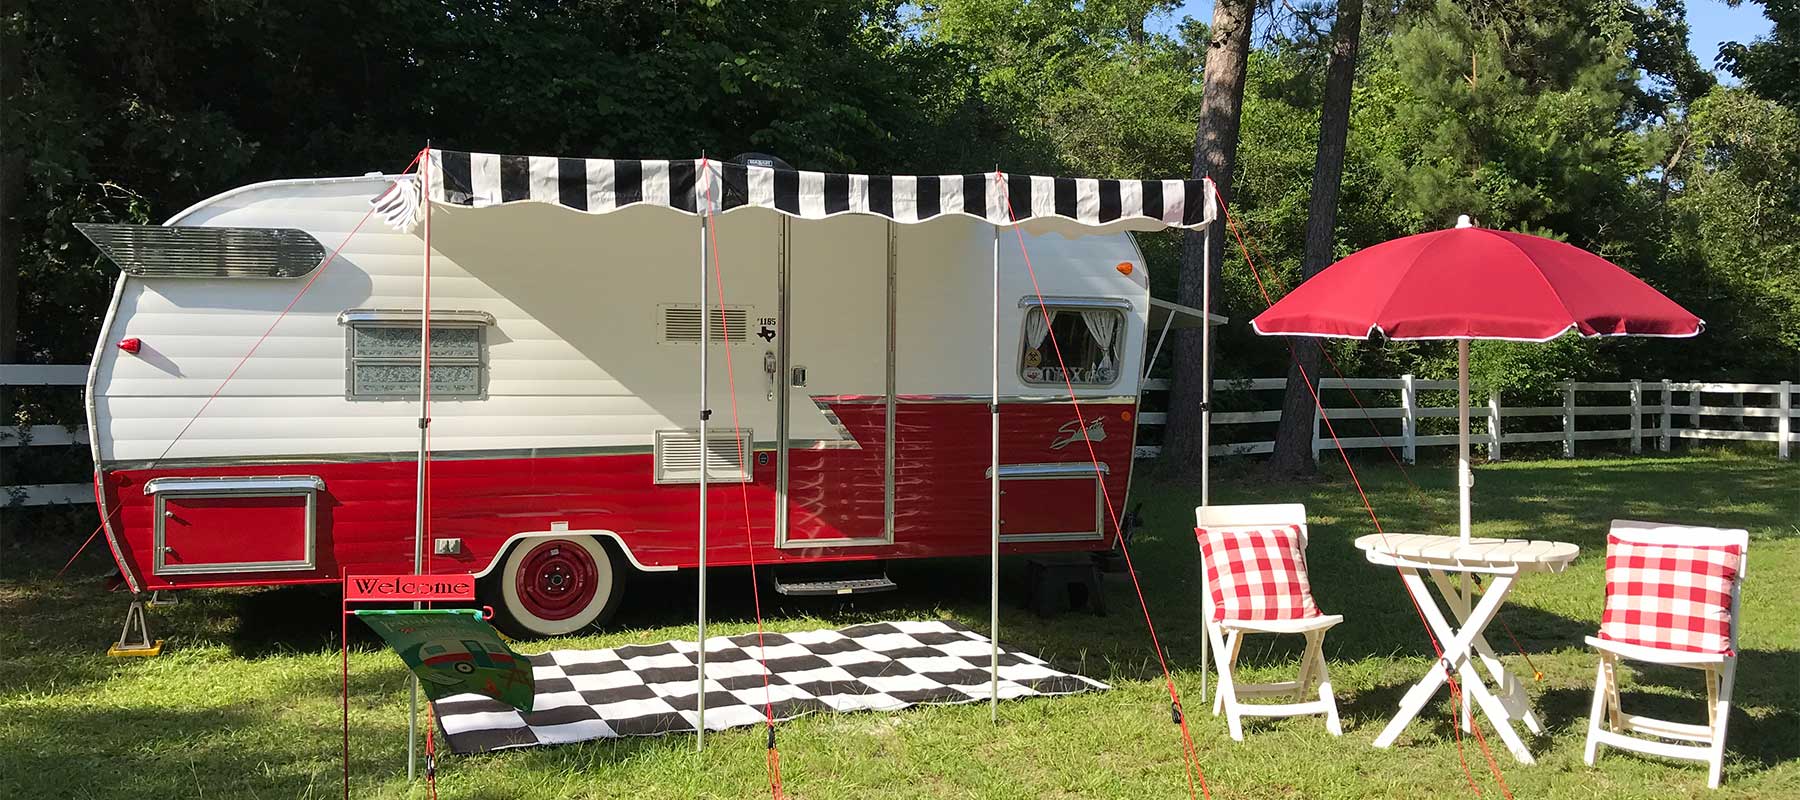
I purchased this travel trailer in 2016, a 1961 Shasta Reissue, and named her Miss Roxie.
Since this is a reissue of a 1961 Shasta, it is is actually a new travel trailer, so there really is no need to remodel her (but I do!).

When I add my personal touch to my trailers (personality is probably a better word), I like to call it “my brand.” You can see my brand applied in many of my Shasta makeover projects.
Decorating the Screen Door: Version 2
I used the same technique on the Shasta as I used on my Casita to decorate the door.
With this project, I also decided to keep the stencil small and placed it on the screen section that holds the metal slide cover to get access to the door’s handle.
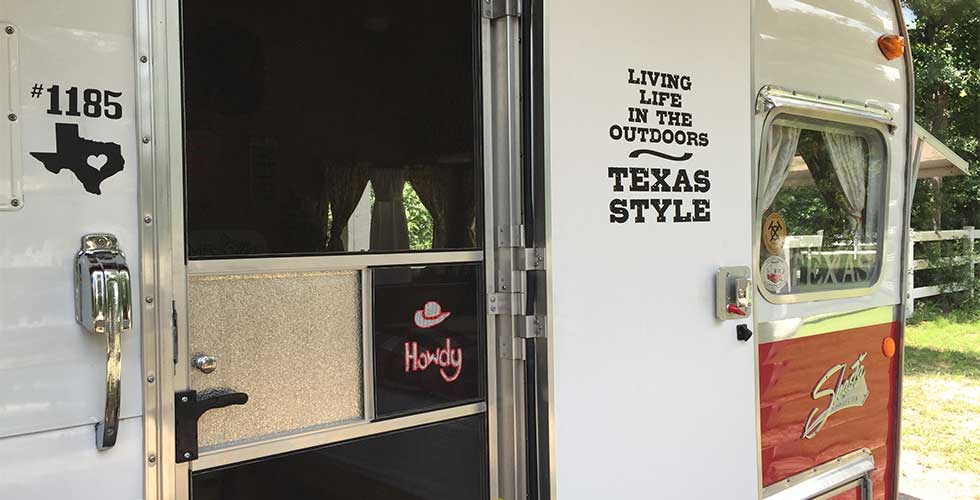
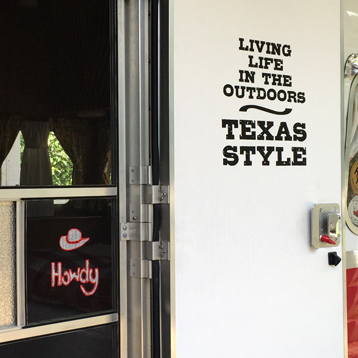
I then added a new element, the vinyl sticker on the interior door. Again, keeping my “brand” in mind, I added my motto, “Living Life in the Outdoors ~ Texas Style!”
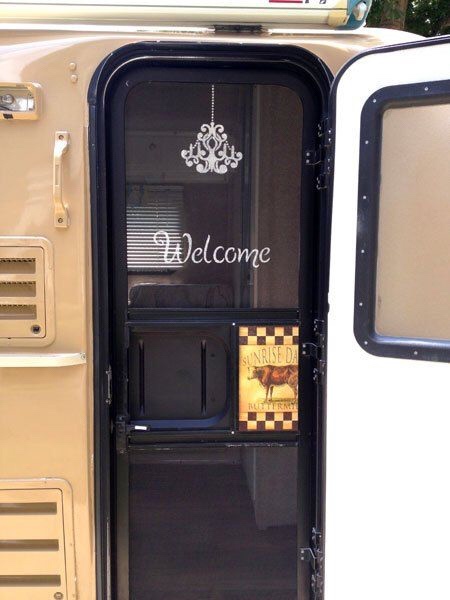
While it is hard to beat the charm of adding a chandelier to a screen, I’m just as happy with the decorating results on my Shasta’s screen door. But I did learn one important lesson you must consider when stenciling the screen doors.
Lesson Learned in Version 2:
You must consider the color of the screen material when choosing your paint color.
On my Casita, the screen material is black, making the PERFECT backdrop for applying the chandelier and welcome stencil using white paint.
advertisement
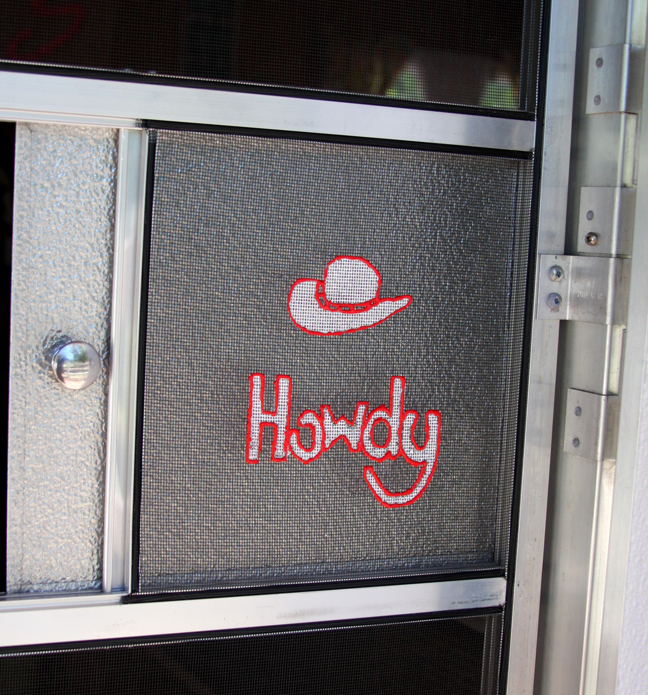
However, when I used white paint to apply the “Howdy” stencil to the silver screen material, it didn’t take long to realize that the white lettering did not show up on the silver screen.
I was disappointed, but I didn’t want to remove all the paint. To fix this problem, I decided to outline the stenciled image with red dimensional fabric paint. It worked like a charm!
Padilly Tip: If you are going to stencil a silver-colored screen door, you may want to choose a dark paint color like black. If your screen door material is black, white (or light), paint works beautifully. But either way, if you don’t feel the stencil stands out enough, outline it as I did with dimensional paint.
Once again, this stenciling project was simple and quick, with great results!
Adding my motto to the inside of my Shasta’s door was the icing on the cake for me!
More Information & Supplies:
I hope you find that the images below clearly show the steps I took to decorate the screen and door of my Shasta.
However, if you need more description or just another example, visit my original article: Stenciling a Screen Door on my Casita Travel Trailer.
Note: If you would like to decorate your trailer’s door using the same (or similar) stencils that I used, and you cannot find them at your local craft store, you can order them here:
- This chandelier is similar in look & scale to the one I used on the Casita: Small Chandelier Stencil (affiliate link).
- This is the welcome stencil I used on the Casita: Welcome Decorative Stencil
 (affiliate link).
 - Here is the dimensional fabric paint (I used red): Fabric Paint, 6-Pack (affiliate link)
Steps I took to decorate my Shasta’s screen and door:
This is the stencil I used.

How the screen looked before applying the stencil. The silver cover in the back slides back and forth.

I had to cut each image from the stencil.
I then used painter’s tape to attach them to the screen.
At this point, check TWICE to make sure your stencils are level!

Applying the paint is easy. Just use craft paint, a stencil brush, and apply. It is better to apply several light coats to reduce getting paint on the back of the screen.

The painting is complete.
advertisement

Before you remove the stencil:
Use a little rubbing alcohol to remove any white paint that got on the backside of the screen. A little paint is okay, but if you use the rubbing alcohol, you should be able to remove most, if not all of it.
It is also good to spray a light coat of clear varnish over the paint to protect it from the elements.

After I removed the stencil, I noticed there were a lot of fuzzy edges. My stencil was not “tight” against the screen, or I pressed the brush too hard against the screen while painting.
I also discovered the white paint on a silver screen is a little difficult to see from a distance.

Since there was no way I could live with these flaws, I decided to fix the problem by outlining the hat and words with red dimensional paint.
I chose dimensional paint to sit above the screen and give much-needed depth and a cleaner edge.

First application around the top of the hat.

Next, I went around the brim.
I added the “hat bands” to give it my personal touch.

The last step was to apply the red paint around the lettering. I was cautious where two letters joined together so it wouldn’t get too thick.
Adding Vinyl Lettering:
With the stenciling complete, I created some vinyl lettering using my Silhouette Cameo. (affiliate link)
This is my FAVORITE new design tool, and you will see that I use vinyl in several areas of my Shasta in my upcoming articles.
Notice the Texas state image and #1185 to the left of the door. I used my Silhouette Cameo to create these pieces of vinyl, too. The #1185 means I own #1185 out of 1941 Shasta Reissues created. 🙂

From boring to POP! I LOVE the results!
PIN IT FOR LATER:

Shasta Makeover Series:
(Links will become active as each article is posted):
- Decorating Your Camper’s Door.
- Create a Cute Flower Box for Your Travel Trailer.
- Yikes! I cut up my vintage dinette to turn into a permanent bed.
- Installing a flexible dining table in your travel trailer.
- Adding a name to your travel trailer? Read this first!
- My Shasta vs. My Casita: An Honest Review
Check out My Casita Makeover! The Series that Started it All! Click the link below to go to the first post in the series.
Do you want to Glamp your Motorhome? You Bet! I did! (Post Coming Soon)
- Should I Glamp my Motorhome? You Bet!
Discover more from Mrs. Padillys Travels
Subscribe to get the latest posts sent to your email.
Hi Mrs. Padilly, I’ve followed your blog for a long time. I copied a lot of your ideas in my Casita. My husband wants me to gets a new retro, but I like my old camper,( it’s old like me.) I’ll turn 70 this month, I don’t plan on camping forever and my little camper is just right. Don’t worry, my camper is not a clone to your old Free range, Mine is more a Nebr. Cowgirl theme. I always enjoy reading your stuff, Thanks, Connie
I’m so happy to hear you were able to apply the projects to your Casita. Best wishes for your upcoming birthday!
Hi, sunset I am a scamp owner, I am wondering why buy a conventional trailer like a Shasta,?. I have had two Shasta’s in the past , but the scamp is the best.
Owned a Casita, so I totally understand why you like the Scamp. But always wanted a tin can. Now I have one. 🙂 Mrs. Padilly
Leave it to you to come up with the exact thing I started to look for last week. Good to see you back around! Enjoy Miss Roxie, but don’t forget us!!
I’ve been away too long! Certainly wouldn’t forget my original WP buds! So happy y’all don’t forget me! 🙂
Are you looking for a travel trailer? Shasta?