There was a time when camping was as easy as driving our pickup to a campground and sleeping in the bed of the truck. We never gave a thought that we’d wake up in the morning with chigger bites or where the nearest bathroom was.
Well, those days are LONG GONE! A comfortable night’s sleep and bathroom facilities have become very important to me. In fact, two of the major renovations of my Shasta revolve around those two things: sleeping and bathroom facilities.
This post will focus on sleeping and why I cut up the vintage dinette table in my Shasta to turn the space into a permanent bed — complete with a REAL (luxury) mattress.
Read on to learn how and why I did it.
advertisement
The Hardest Makeover Decision
I have to admit that taking out the table was one of the hardest makeover decisions I ever made on a trailer makeover. Who doesn’t love the Shasta’s dinette?! This reissue version stayed as true as possible to the original design.

However, when measured against a good night’s sleep, I didn’t love it enough to keep it.
The good news is I used the old table to make a new dining area, which I show you in my next article, “Installing a Multi-Position Dining Table in a Travel Trailer.”
Converting the Original Dinette into a Bed
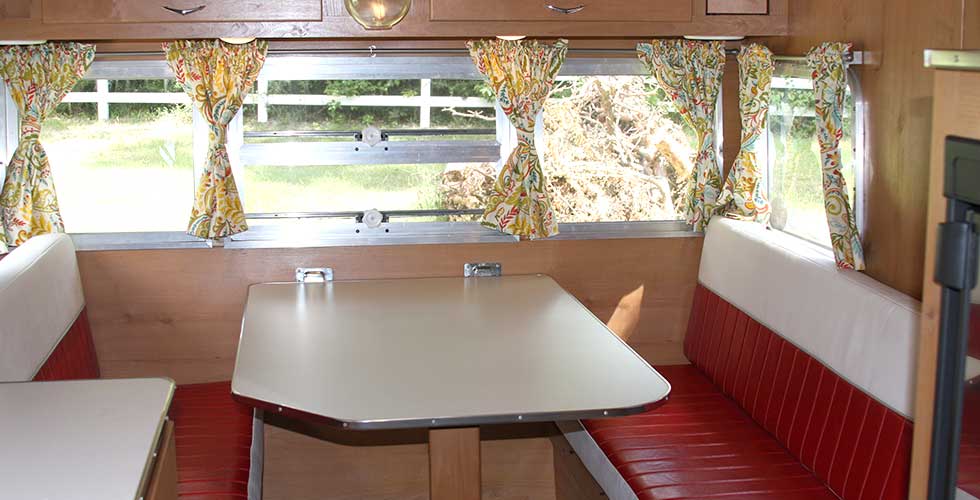
Before deciding to take out the dinette, we first tried to sleep on the converted table.
The picture below shows what the table looked like when lowered into the sleeping position.

After the table is lowered into position, you placed all the dinette cushions on top. At this point, you could throw some sleeping bags on top, but I wanted something more comfortable, so I placed a 4″ foam top on the cushions and then some bed linens.
Unfortunately, it still wasn’t comfortable enough for me, plus it wasn’t easy to make the bed.

Taking out the Vintage Dinette:
Taking the table out was easy; I just lifted it off the supports located on the upper wall. After the table was gone, all I needed to do was remove the hardware.
If you look again at the image above, you will see two metal brackets under the window. I left those in place as their removal wasn’t necessary, and I didn’t want to fill the holes.
But it was necessary to remove the bracket you see below. These were located along the side of the mattress and were sharp, but I did choose to leave the screws in the wall because, again, I didn’t want to fill any holes, and the mattress would cover them.

If you look closely at the next image, you can see the eight screws in the wall after removing the table hardware. Also, look closely at the edge support on each bench and how the plywood base on the benches is taller than the table supports on the side.
advertisement
The difference between the base and the support is 3/4″, so we used 3/4″ plywood to create our new foundation.

Creating a Platform Base for the New Mattress:
The next image shows the finished mattress base Mr. Padilly made from a piece of 3/4″ plywood.
Notice we also decided to take a 2″ x 4″ board and attach it to the middle to give us a little additional support. Also, note we had to cut the 2″ x 4″ board slightly shorter than the width of the plywood to make room for the edging supports on each of the benches.

The next picture shows the new mattress support in place, and it’s a perfect fit.

Below is a view from the underside. You can see how the 2″ x 4″ reinforcement board meets up with the support edging on the benches in this image. This bed base isn’t going anywhere!

Putting the Mattress in Place – the First time
When I purchased the new mattress, the key features I was looking for were comfort AND lightness. I found the mattress I needed at a local mattress store for around $500.
Some may think this is a bit much for a trailer mattress, but comfort and lightness were key. I needed the mattress to be easy to lift (to make the bed) and light enough not to add excessive weight to the front of the Shasta. But most important was comfort!

However, after we put the mattress in place, we noticed a potential problem; the mattress could easily slide off the platform’s edge during transport.
To fix this, Mr. Padilly created the edge piece you see on top of the mattress in the image above.
After he cut the edge piece to size, he then drilled it with some pocket holes to have a nice clean edge from the outside while giving it a lot of support to the frame.
advertisement
The next image shows the edge piece in place, and if you look closely, you can see two of the pocket holes, which we screwed into the framework below.

Here is another image of the mattress base and edging in place. Notice the screw heads and pencil line on the upper portion of the base. This is where the 2 x 4 board (on the underside) was attached and secured with the screws. 
With the new mattress back in place, you can see how the added wood edging will keep the mattress from falling off.

The New Bed Makeover is Complete!
The transformation from a dinette to a permanent bed is complete. The next two images will give you a feel for the bed and the overall look of the space.
However, I’m afraid you will have to wait for the final reveal of the Shasta to see this space and Miss Roxie, all dressed for glamping! 🙂


One Piece of Advice
I must repeat, this was a tough modification to make because I was removing a key element of the Shasta! If you want to stay true to the original design of your travel trailer, this may not be the project for you! Before you decide to modify, ask yourself, “would I buy this travel trailer without its original table?” Then ask yourself, “Do I need a good night’s sleep?”
As for me, I am thrilled I turned the dinette into a permanent bed! The truth is, for us, we rarely used the original dinette, and a good night’s sleep was WAY more important to us.
In my next article, “Installing a Multi-Position Dining Table in a Travel Trailer,” I will show you how I repurposed the old dinette table into a new, multi-positional, multi-functional dining table that I love! I think you will be surprised!!!
Happy Trails!
Mrs. Padilly
Shasta Makeover Series:
(Links will become active as each article is posted):
- Decorating Your Camper’s Door.
- Create a Cute Flower Box for Your Travel Trailer.
- Yikes! I cut up my vintage dinette to turn into a permanent bed.
- Installing a flexible dining table in your travel trailer.
- Adding a name to your travel trailer? Read this first!
- Glamping Makeover Reveal: Showcasing Miss Roxie
- My Shasta vs. My Casita: An Honest Review
Check out My Casita Makeover! The Series that Started it All! Click the link below to go to the first post in the series.
Do you want to Glamp your Motorhome? You Bet! I did! (Post Coming Soon)
- Should I Glamp my Motorhome? You Bet!
Discover more from Mrs. Padillys Travels
Subscribe to get the latest posts sent to your email.
Looks great!
I don’t have a shasta but I’m in the middle of doing the same thing to my 2015 Coleman Lantern. My biggest issue right now is finding a mattress that fits , a little modification like how you did where the mattress won’t fall off during transportation would be ok. Except id have to make it flush with the floor , covering the small storage space underneath. What size mattress did you use?
Hello Ashton, thank you for your question.
The mattress is Full size on the Shasta. It is also a VERY LIGHT mattress (just foam) since I needed to be careful of the tongue weight. I got it at one of the local mattress stores, and yes, the rail you see installed was important to keep the mattress from sliding off, especially while in transport.
If you have an unusual mattress size, you might want to consider getting a large piece of memory and cutting it to shape. I actually had to do this for my Casita, as the corners of the Casita are curved when the table was converted to a bed. I just cut to shape, placed it on top of the dinette cushions (which were also needed to make the bed), and wrapped a good quality mattress pad around to hold onto the memory foam and dinette cushions. This link shows the page with the Casita interior and bed. http://mrspadillystravels.com/unveiling-my-casita-travel-trailers-makeover/
Wish I could purchase your dinette table and cushions! (like other comments)
However, your decision to put those items in storage is wise (sadly for me), because these original components are valuable to purists. Your bed looks really nice and comfortable.
Thanks, CJ. Totally understand.
Well done!
Would you be willing to sell those dinette cushions and table? Our Shasta reissue that we bought, the previous owners did what you decided to do and put in a permanent bed. For us though, we need the functionality of the dinette. Let me know if they’re available.
Hi David. I did give that some thought, but decided to put the cushions and hardware into storage. I will sell the Shasta one day, and wanted the new owners to have the option to go back to the dinette. Some prefer a good nights sleep, some prefer a great place to eat! 🙂
Now that looks really comfy! 🙂 Definitely worth all the work.
In my “old sailing days” I’ve never liked to turn a dinette into a bed and thus always chartered a boat big enough so that no one would have to sleep in the salon.
Since you are an “old” (your words) sailor, you need to follow our new blog, http://www.svBeautifulDreamer.com. It is just in its start up, but by this time next year we should be moving it from her home in Kemah, Texas to her new home in Tampa, Florida. 🙂